GINGERBREAD HOUSE TUTORIAL
Follow the simple step-by-step video & have fun!
Now let’s get started!
1) ROYAL ICING
First, you will need to make the royal icing by adding 1 or 2 squeezes of water into the royal icing powder. The consistency of royal icing needs to be thick, not watery. If the consistency is not thick enough, it may result in bleeding of the royal icing and slow drying. In case of over-added water, you may add more royal icing powder to thicken the royal icing.
2) CREATE YOUR CUSTOM COLOR
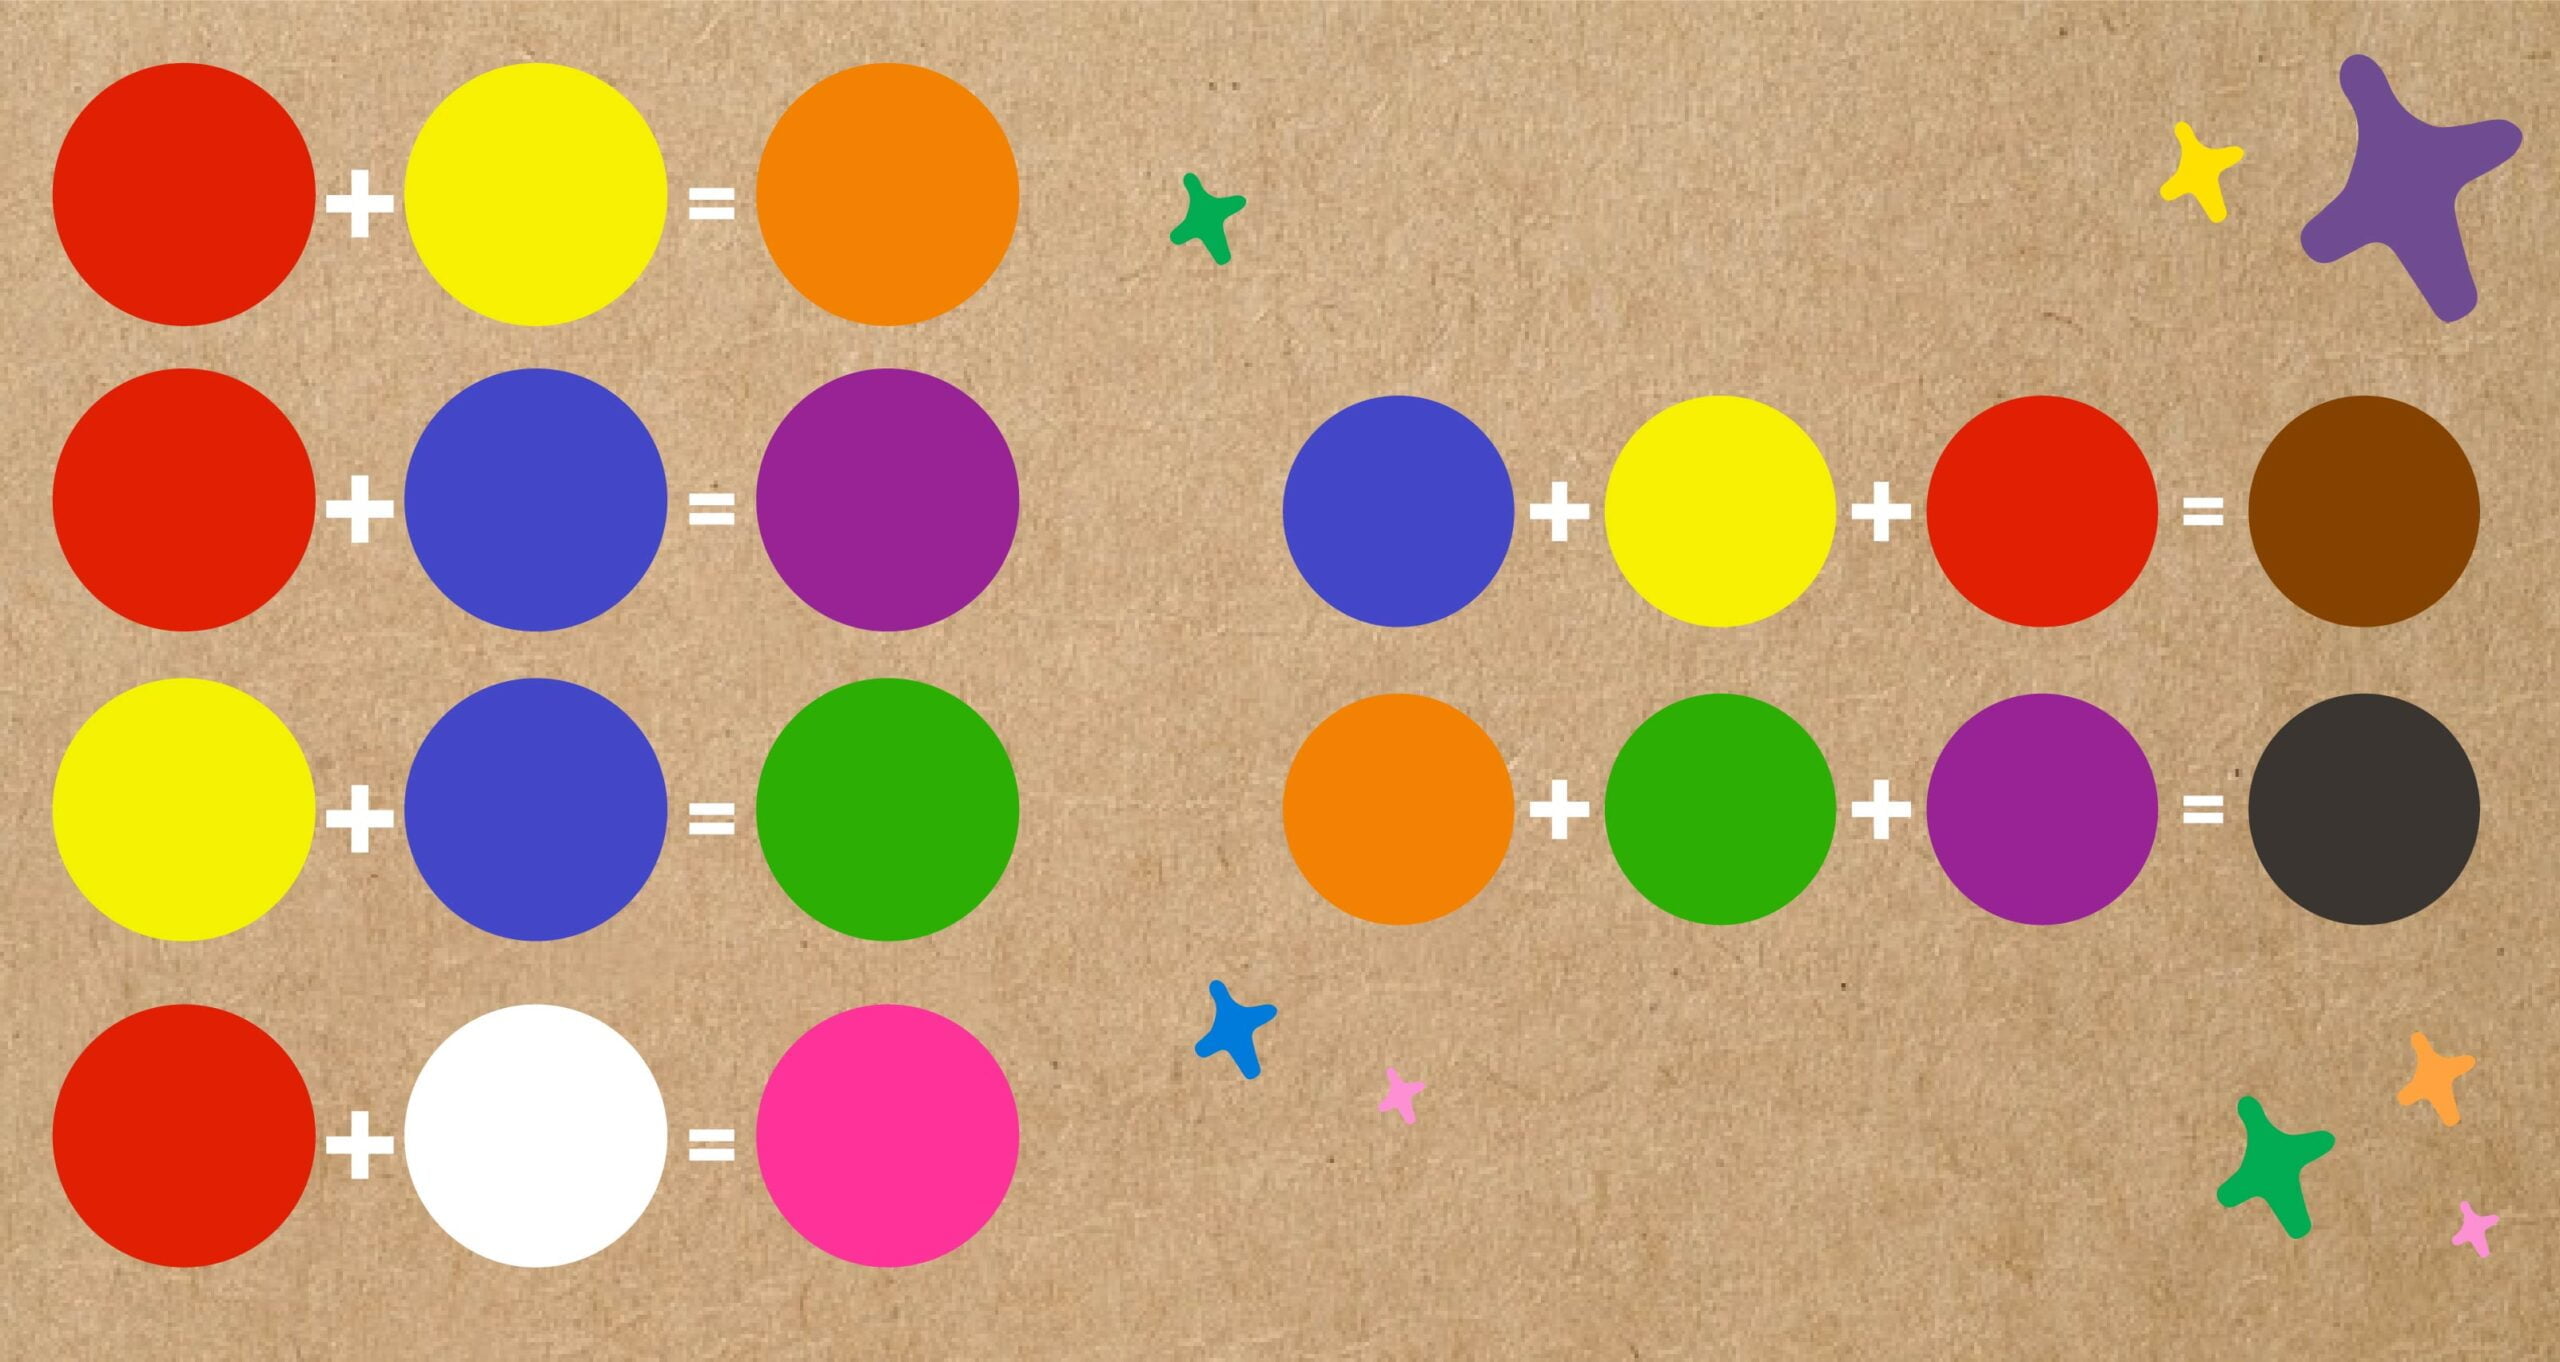
Time to add color to the royal icing. You can create any color just by mixing the 3 food colors provided (red, blue & yellow). You can refer to the color chart below to create your very own custom color.
3) PIPING BAG
Once you have your colored royal icing ready, the last step is to transfer the royal icing into a piping bag, snip the end of the piping bag & you are ready to decorate!
CREATE YOUR CUSTOM COLOR!
You can refer to the color mixing chart below to create your custom color. The color will change depends on the amount of food coloring you add-in. Remember, use 1 drop at a time, the food coloring is strong so a little goes a long way.

Decorate, assemble & have fun!
4) DECORATE
Use your custom color royal icing to decorate the pieces. Best to start with outlining the design before filling it in with color. This way you can prevent the royal icing from spilling over the edge of your cookies. You can layer the design with different colors. You can layer the color when the royal icing is still in a liquid state, or you can layer it after the first layer is dry, this way the layering will create texture.
5) ASSEMBLE
After you are done decorating your cookies pieces, it is time to assemble them together. Use the royal icing as glue to hold the pieces together. Best if the royal icing is a thick consistency, it will hold the pieces better.
6) HAVE FUN!
Now you have completed your edible 3D creation! Do what you want with it 😊. You can use your creation as decoration for your teatime spread, play with it & eat it!
